Introduction
Ever wondered why a Proxmox VM might appear to use less memory than you allocated it? That’s not a bug — it’s memory ballooning at work. Ballooning is one of those behind-the-scenes features that most Proxmox users benefit from without fully understanding how or why it functions.
In my home lab, I run multiple VMs with different roles, and memory is one of my most carefully managed resources. After digging into ballooning while troubleshooting memory reporting on a Docker host and a Kali Linux VM, I realized I needed a clearer understanding — and a place to document it for future reference.
This post is for anyone who wants to confirm that ballooning is actually working in their VMs, not just enabled in the config. I’ll walk through what it is, how it works, and how I verified it in my own Proxmox setup.
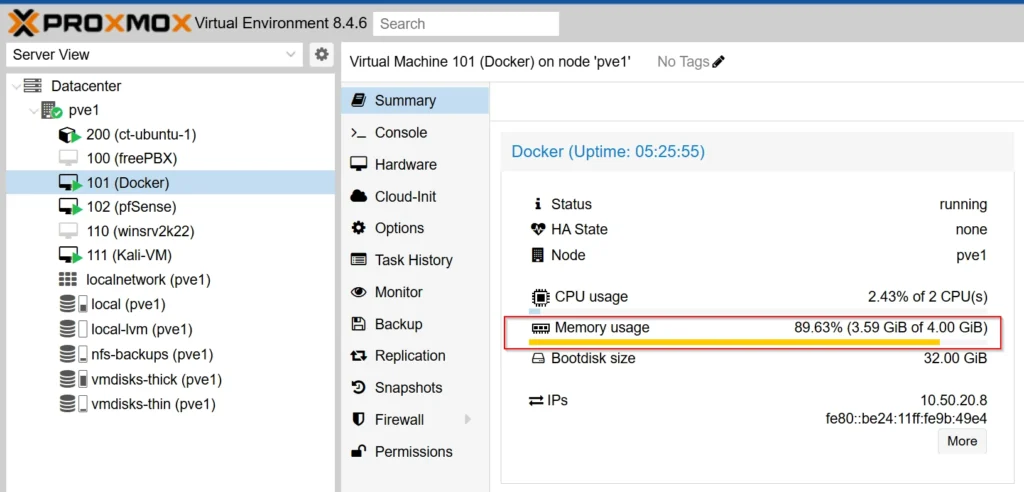
Table of Contents
What Is Memory Ballooning?
Memory ballooning is a technique used by Proxmox to dynamically manage a VM’s memory usage. Instead of giving a VM fixed, untouchable RAM, Proxmox can “borrow back” unused memory from a guest and reassign it elsewhere — all without shutting down the VM or overcommitting dangerously.
It works through a virtual device called the balloon driver, typically implemented via virtio_balloon in Linux guests. When the host experiences memory pressure, Proxmox signals the guest OS to “inflate the balloon,” reserving RAM that the guest isn’t actively using. That memory is then made available to other VMs or the host itself. When the pressure eases, the balloon “deflates,” and the guest reclaims that RAM.
Unlike swap or hibernation, ballooning is cooperative — it doesn’t force memory out; it requests it. This makes it ideal for shared-resource environments where you want elasticity without compromising guest stability.
Why Memory Ballooning Matters
In a homelab or resource-constrained Proxmox setup, every gigabyte counts. Memory ballooning gives you a way to safely overcommit memory — assigning more total RAM across all VMs than you physically have — without compromising system stability. This flexibility is especially useful when many of your VMs sit idle for stretches of time.
Ballooning helps ensure that idle VMs don’t hoard RAM they aren’t actively using, allowing Proxmox to redistribute that memory where it’s needed most. For example, when a container host ramps up resource use or a Windows VM spikes during updates, ballooning helps smooth out the load.
It’s not about reducing memory usage — it’s about giving Proxmox more control over how RAM is shared in real time.
How Memory Ballooning Works
Memory ballooning relies on cooperation between the Proxmox host, the virtual machine’s hypervisor layer (QEMU/KVM), and the guest operating system. It works silently in the background, but once you know how to check it, it becomes easy to understand.
1. Host Configuration
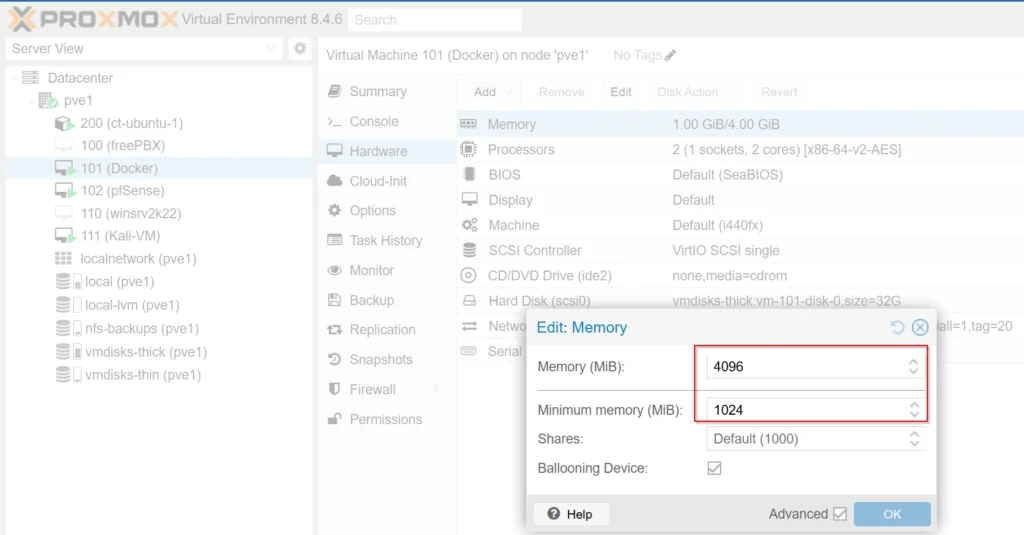
In Proxmox, ballooning is enabled by setting two values for a VM:
- memory: the maximum RAM the guest can use (e.g. 4096 MB)
- balloon: the minimum guaranteed RAM the guest should always have (e.g. 1024 MB)
This tells Proxmox: “You can give this VM up to 4 GB, but you’re allowed to shrink it down to 1 GB if needed.”
2. Guest Driver Behavior
Inside the VM, a special device called virtio_balloon either comes built into the kernel or loads as a module. When Proxmox signals that it needs memory, the guest OS inflates the balloon — allocating unused pages to the driver and releasing them to the host. When the host no longer needs that RAM, the balloon deflates, and the guest regains the memory.
3. Monitoring and Stats
You can monitor ballooning in action using the qm monitor <vmid> command followed by info balloon. This displays live values such as:
- actual: how much RAM the guest is using now
- free_mem and total_mem: reported by the guest agent or kernel
last_update: timestamp of the last ballooning event
The balloon only adjusts when the Proxmox host detects memory pressure.
Example: Verifying Ballooning on Two VMs
To confirm how ballooning works in practice, I tested it on two different VMs in my Proxmox lab: an Ubuntu-based Docker host and a fresh Kali Linux install. Both VMs were configured with memory: 4096 and balloon: 1024, allowing the host to reclaim memory if needed.
VM 1: Docker Host (Ubuntu 24.04)
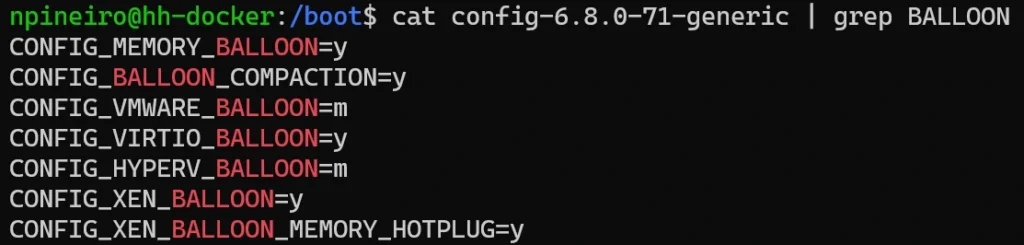
At first, I wasn’t sure if ballooning was working — the virtio_balloon module didn’t show up with lsmod, and /sys/class/virtio_balloon didn’t exist. However, info balloon from the qm monitor interface reported values like actual, free_mem, and major_page_faults, which confirmed the balloon device was functioning. In this case, ballooning was compiled directly into the kernel.


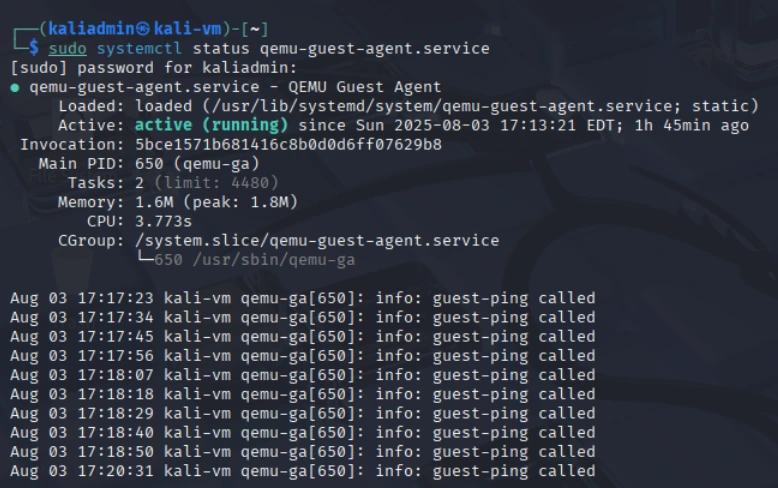
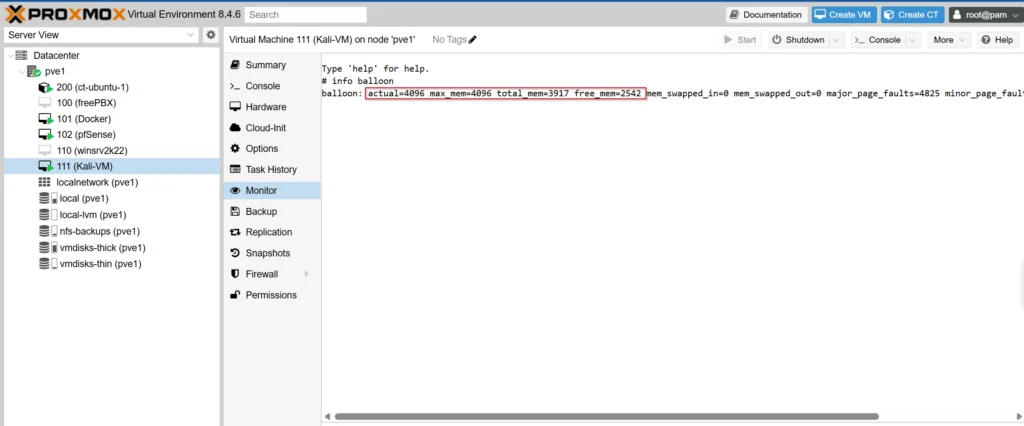
VM 2: Kali Linux 2025
Kali had the QEMU guest agent running by default, which made it easier to monitor. Using the GUI-based qm monitor tool in Proxmox, I checked info balloon while the VM was idle. The guest reported over 2 GB of free memory out of the 4 GB assigned — clear evidence that ballooning was not only enabled, but accurately reflecting the VM’s current usage.
I didn’t run any memory stress tests — the goal was simply to confirm that ballooning was present and functioning correctly.
Misconceptions or Gotchas
One common misconception is that ballooning should always result in reduced memory usage. In reality, ballooning only activates when the Proxmox host needs to reclaim memory — if there’s no pressure, the balloon stays deflated, and the VM keeps all its RAM.
Another gotcha: if the virtio_balloon driver is built into the kernel, you won’t see it with lsmod, and /sys/class/virtio_balloon might not exist. That doesn’t mean it’s not working — you need to check info balloon in the Proxmox monitor to be sure.
Some minimal Linux distros don’t support ballooning out of the box, and not all memory stats in the GUI or free -h reflect balloon activity accurately. Trust the monitor output.
Final Thoughts
Memory ballooning in Proxmox isn’t something you notice day-to-day — but it plays a key role in keeping your environment efficient and responsive. After validating it on two different VMs, I’m more confident in how to verify that it’s working and what signs to look for.
Whether the driver is built in or shows up as a module, the real indicator is how the balloon behaves when observed through qm monitor. Going forward, I plan to include ballooning validation in my VM setup checklist and explore ways to log balloon stats over time for deeper insight.