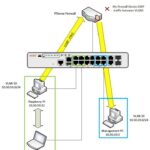
This pfsense box will be the heart of my network. Currently Im using a TP-Link Archer AX50 as my router, switch, and access point. My plan is to make this pfsense box the edge of my network and connect 2 layer 3 switches to it. One switch will manage my home network and the other will be for my Lab but more on that later. Then I will configure the AX 50 router into access point mode to provide wireless connectivity to my home LAN.
Ok lets start with the hardware. To build my pfSense box I will be using an HP Compaq Pro 6300 Microtower:
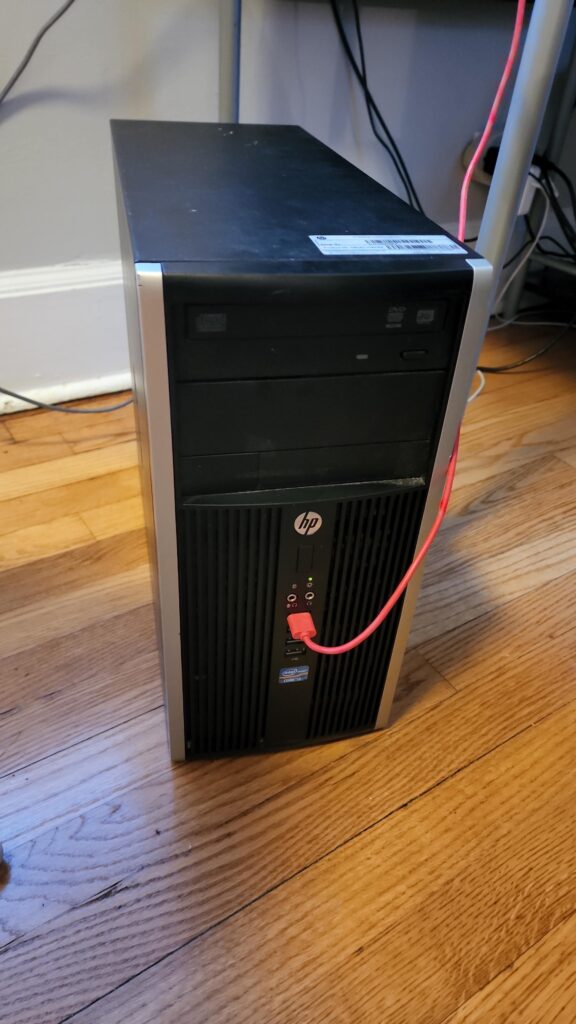
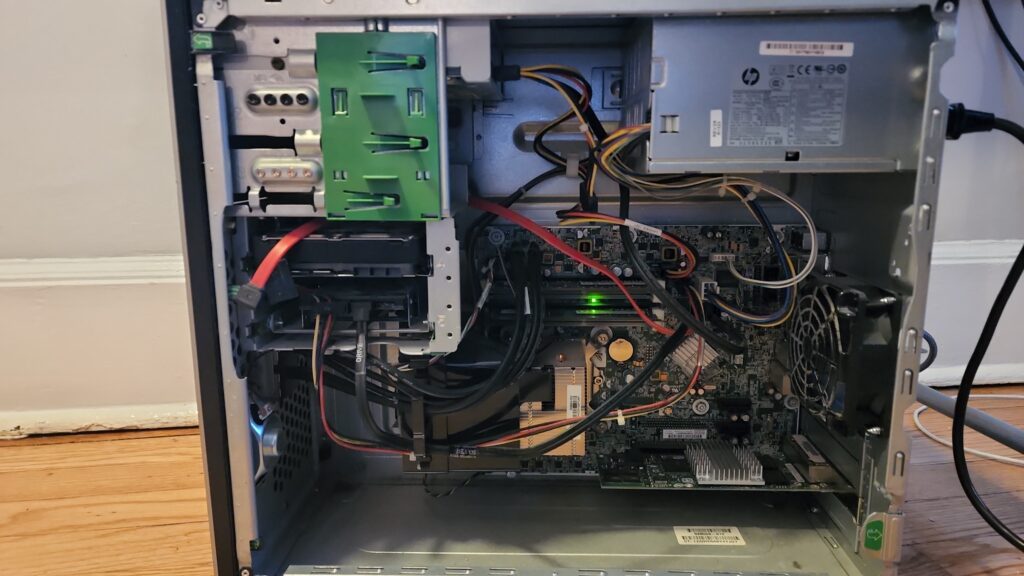
I really wish I didn’t have to use this. I much rather have something with a small form factor like an HP thin client that I can throw a 4 port NIC into or some other kind of mini pc that I can use as a firewall appliance but this will have to do for now. I already have pfsense installed on this computer but I want to factory reset it to have a little fun. This time around I want to properly document the process. In the pfsense console, I initiated a factory reset with option 4 and then completed a setup wizard. In this setup wizard I made sure to enable DHCP on the LAN interface so that my laptop would be able to get an IP address when I connect to it.

Here is a list of configurations I will make after finishing the first time setup wizard:
-Enable SSH
-Turn off web GUI redirect to port 80
-Assign a non-common tcp port for the web GUI
-Enable NAT Reflection
-Disable IPv6
-Configure dashboard
-Reassign interfaces
-Create a new admin account to access web GUI
-Disable default admin account
-Configure DHCP Server
-Create deny all any-any rule for LAN
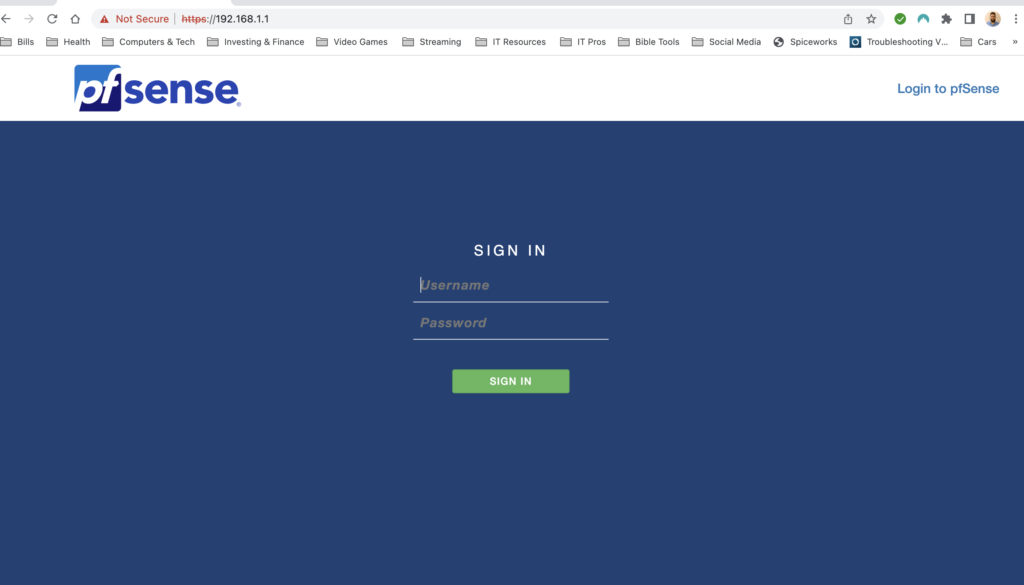
After the console setup, I moved the pfsense box to my living room so that I can run it headless without any external display or keyboard connected to it. I ran a network cable directly from my computer to the LAN interface of my pfsense and got an IP address. The default IP address for the GUI is 192.168.1.1 and the default username/password is admin/pfsense.
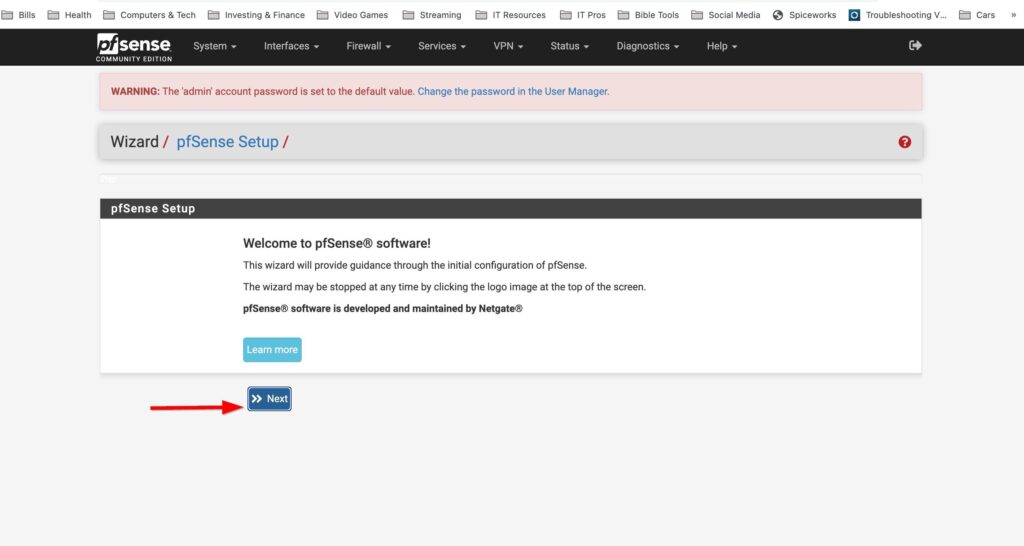
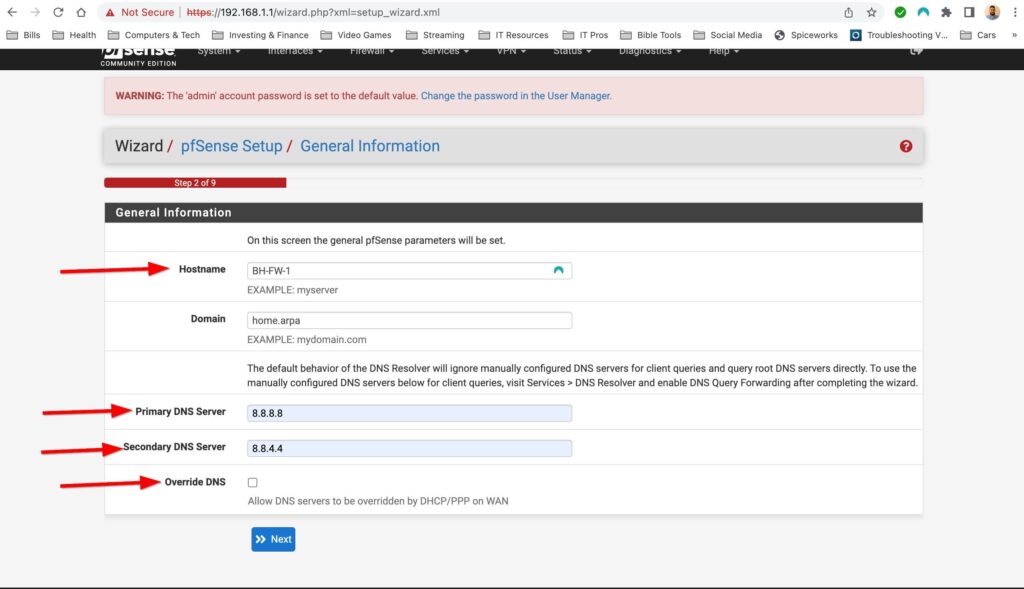
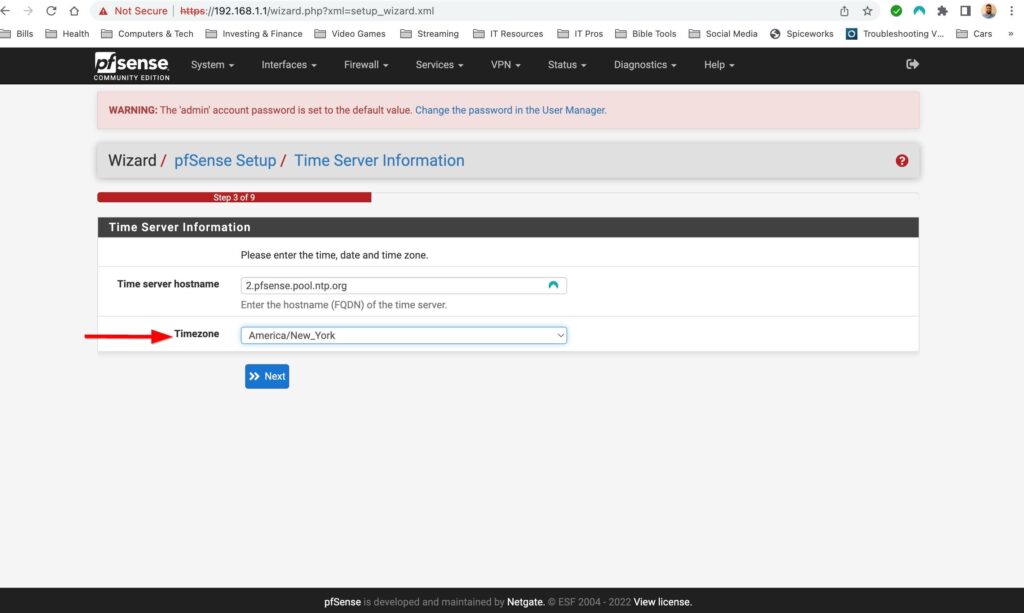
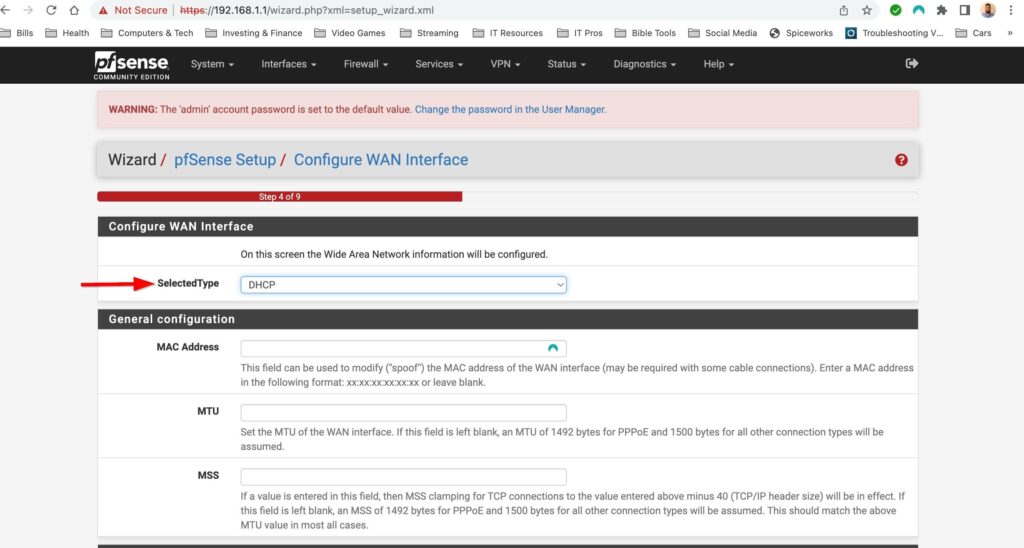
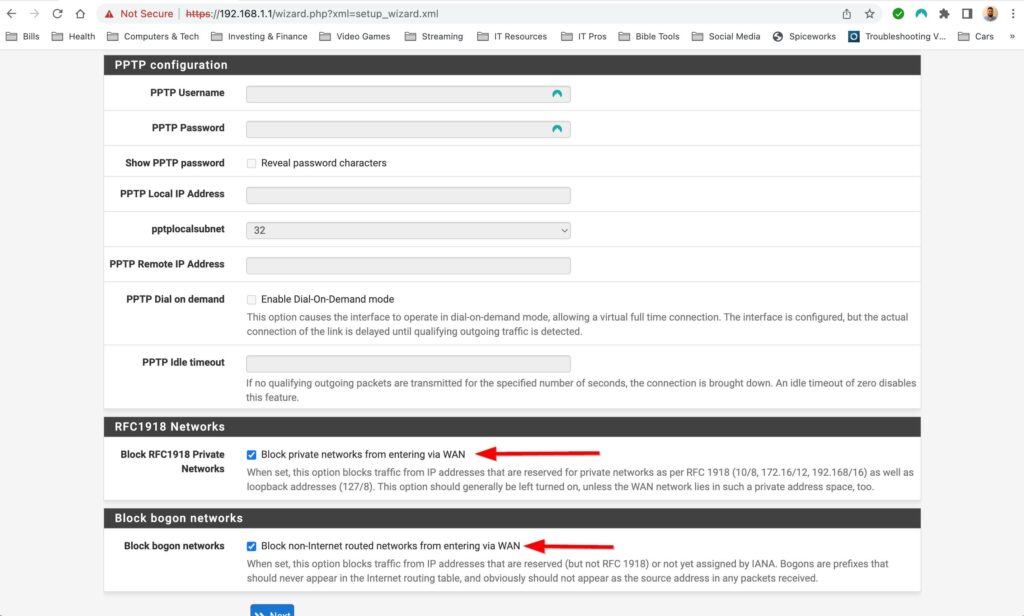
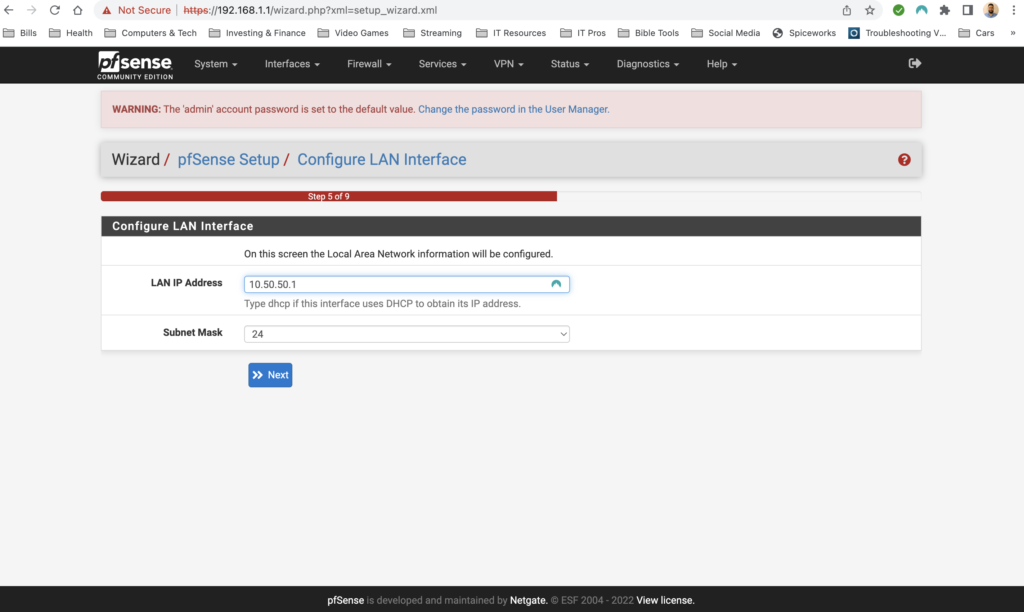
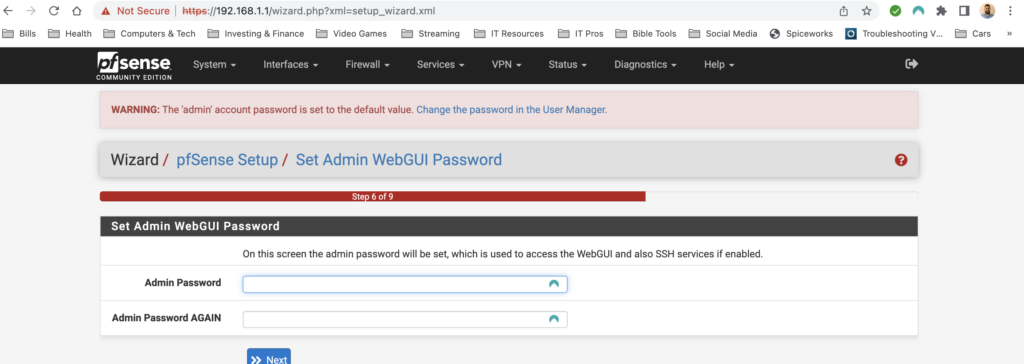
The first time setup wizard was pretty straight forward. It had me configure a hostname, DNS servers, time zone and NTP server, my WAN and LAN interface as well as change the default password. The only thing special to note here is that I turned off “Override DNS” I don’t want the assigned DNS servers that my ISP would give me via DHCP to override the DNS servers that I have manually configured. Also I configured my WAN interface as DHCP because I do not have a static public IP address.
First Time Setup Wizard:

Config Items:
-Enable SSH
-Turn off web GUI redirect to port 80
-Assign a non-common tcp port for the web GUI
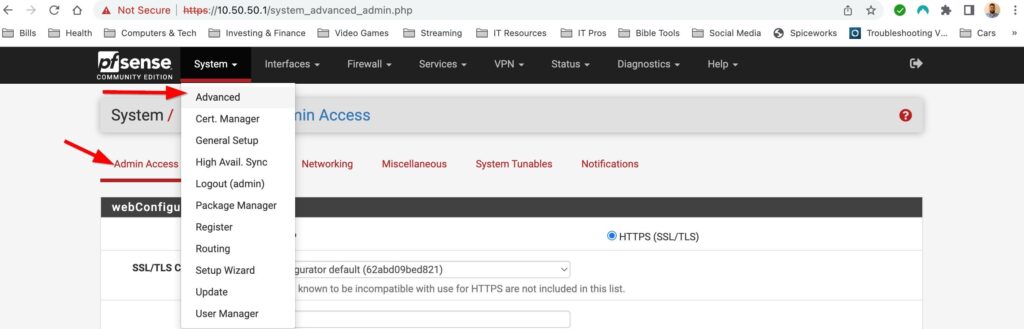
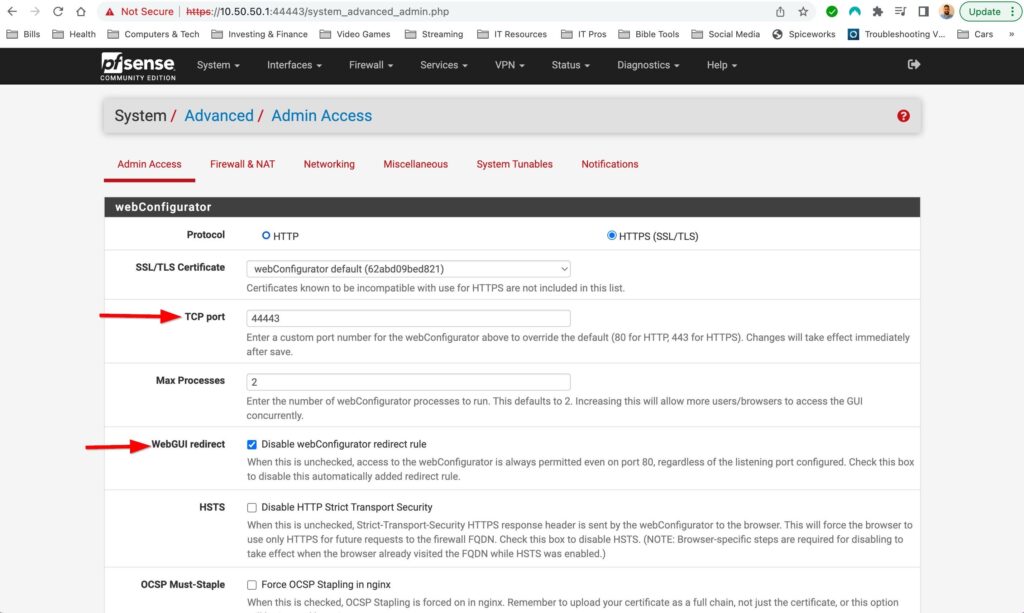
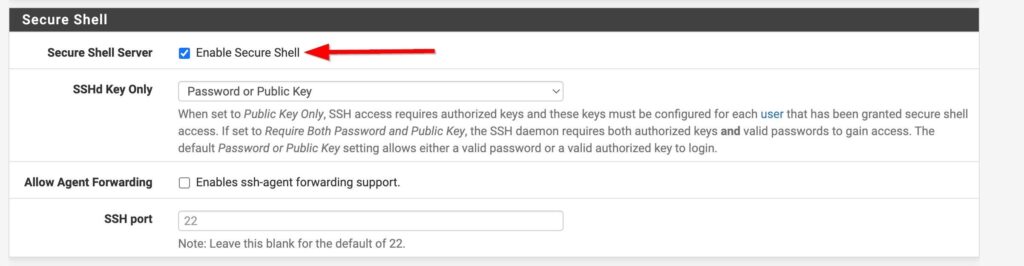
First place I want start configuring is the Admin Access options. You can each this by selecting System>Advanced>Admin Access up at the top left. I want to enable ssh so that I can manage my pfsense box via console from my LAN. By default the web GUI uses TCP port 80 and I want to change this and access the web GUI from a different port. Only reason I want to change it is so it not on a common port. I have set it to port 44443 just because. I also want to make sure that Im actually using the port I just configured so in pfSense I need to turn off the option for web GUI redirect to port 80.
Config Items:
-Enable NAT Reflection
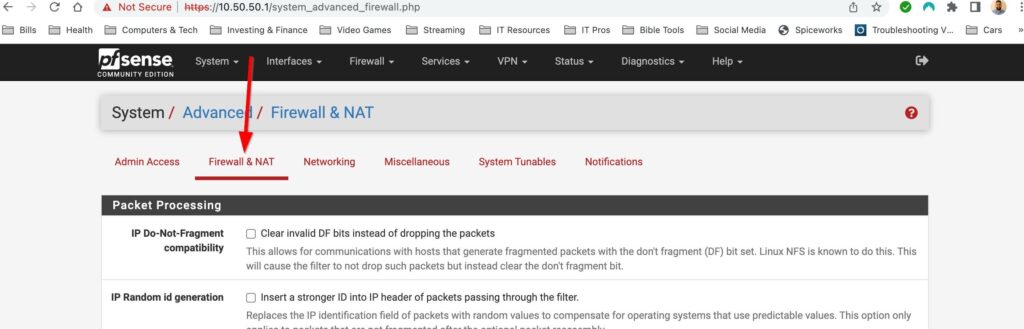
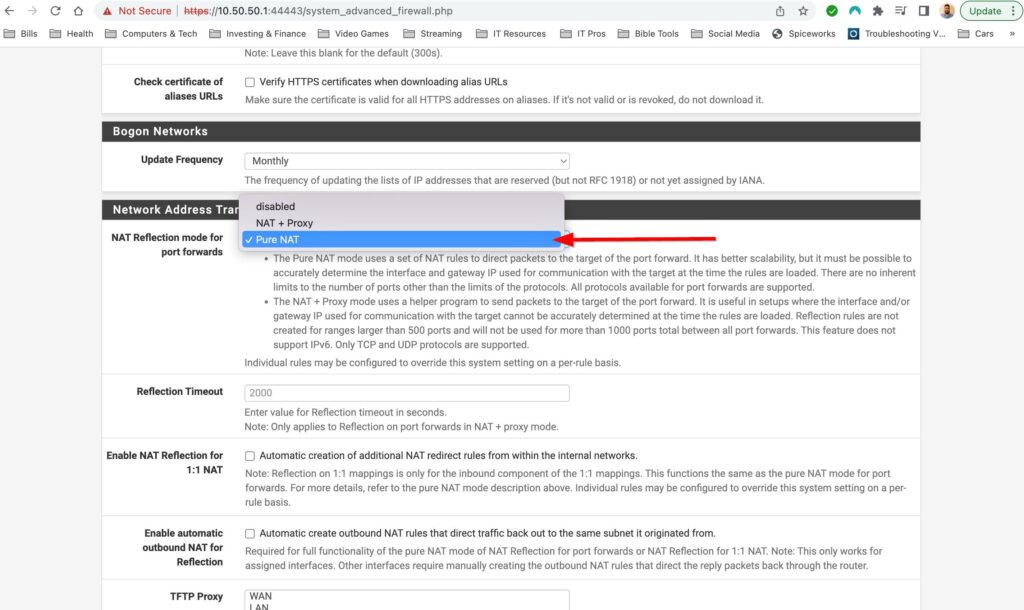
Next I want to enable NAT Reflection. We can do this by selecting System>Advanced>Firewall & NAT, finding the drop down menu for NAT Reflection mode and selecting Pure NAT. The Pure NAT option enables NAT Reflection. The amazing documentation from Netgate explains it best:
“NAT reflection refers to the ability to access external services from the internal network using the external (usually public) IP address, the same as if the client were on the Internet”
In the future I want to play with hosting servers that I can publicly access on the internet so I am just preemptively turning this on for when I need to access those servers from my LAN.
Config Item:
-Disable IPv6
Im turning off IPv6 because Im not using IPv6 in my network at the moment and if I don’t disable this then I will see a disabled iPv6 default gateway in my dashboard and I just don’t want that there so Im disabling. You can disable Ipv6 by selecting System>Advanced>Networking and then checking off the box to disable.

Config Item:
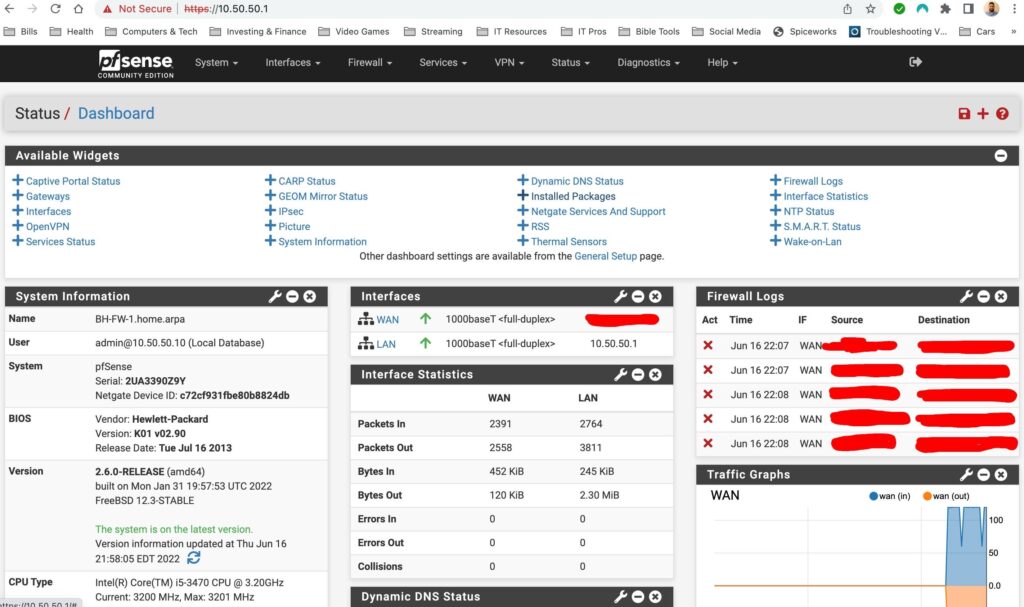
-Configure dashboard
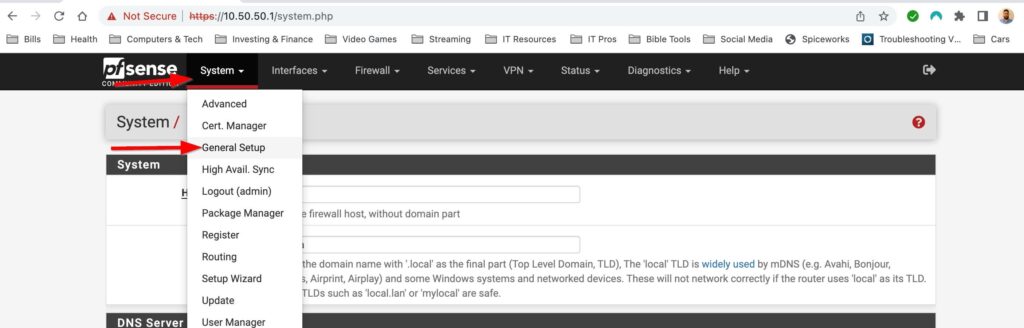
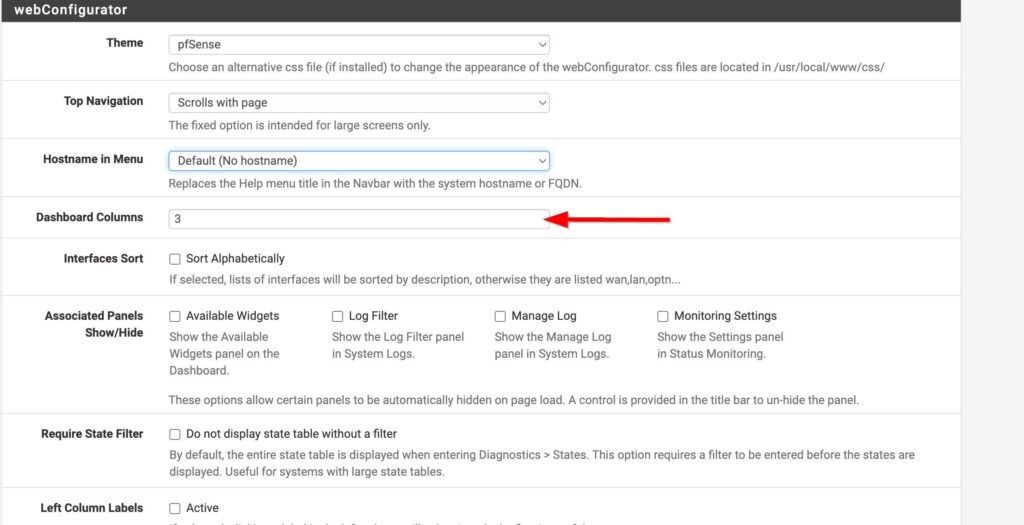
Here I decided to add a column to my dashboard, add a few cards and take some out. You can add a column by going to System>General Setup, scrolling down until you see Dashboard column and then changing the value. Then select save, go back to the dashboard, expand the available widgets and add the ones you want. Don’t forget to save!
Config item:
-Reassign interfaces
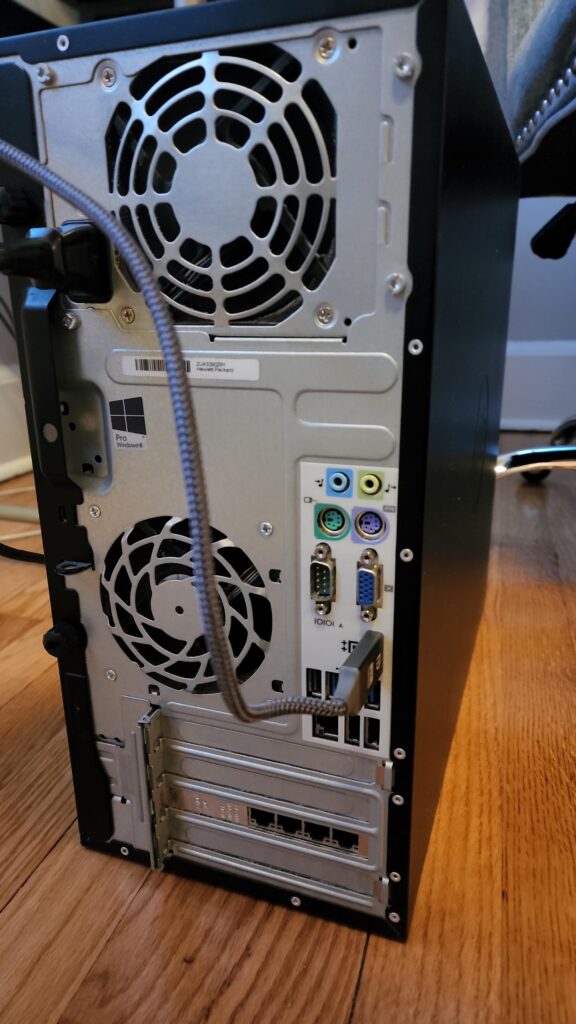
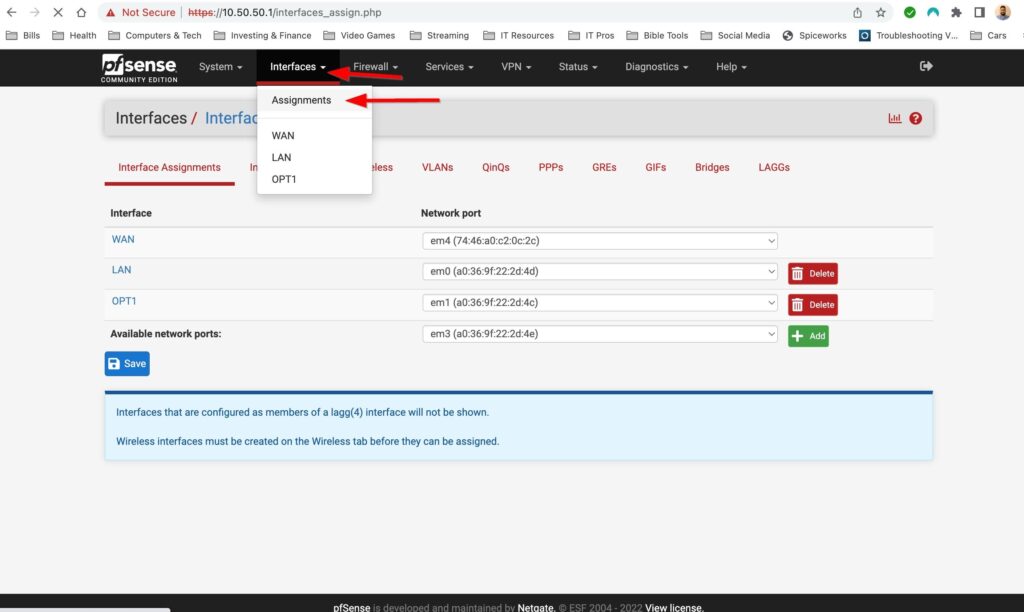
I wanted to reassign my WAN and LAN interfaces. I want my WAN interface to be assigned to the onboard NIC and want my LAN and my Lab Network to be assigned to interfaces on the 4 port Intel NIC. You can make changes to interfaces by selecting Interfaces>Assignments.
My interfaces assignments:
WAN = em4
LAN = em0
OPT = em1
Config Item:
-Create a new admin account to access webGUI
-Disable default admin account
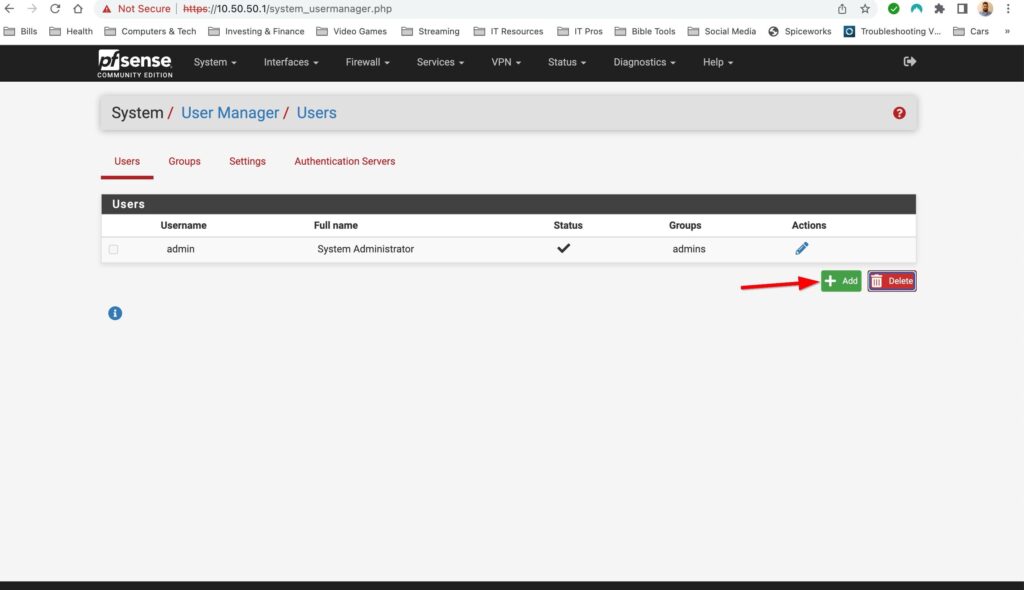
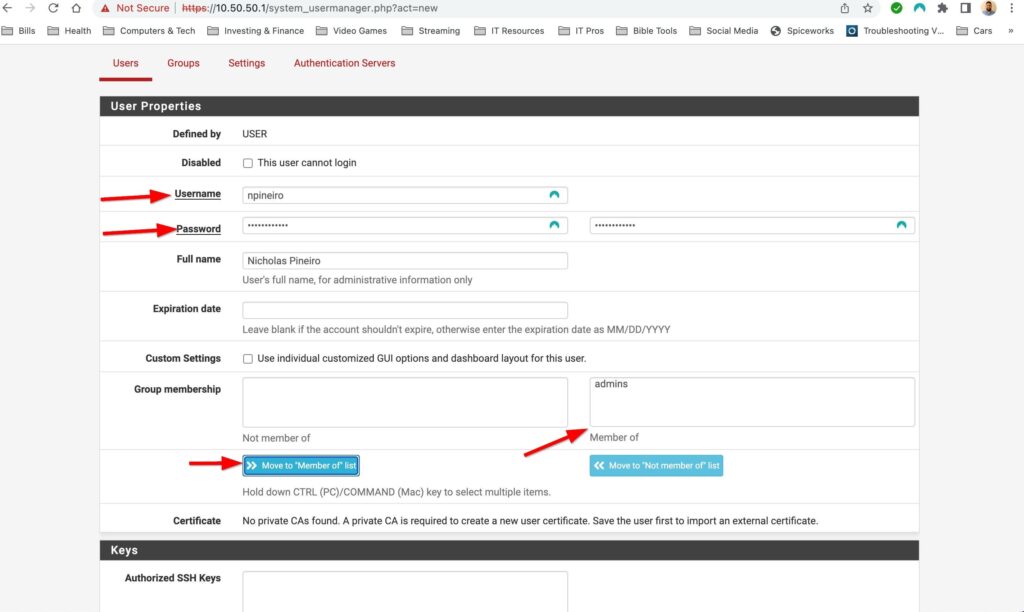
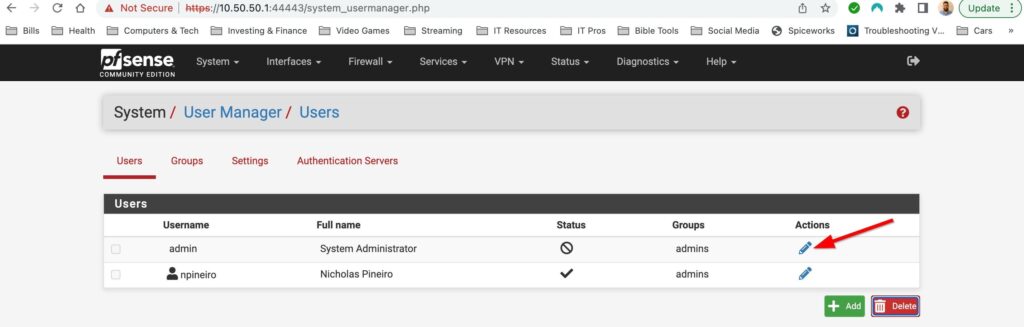
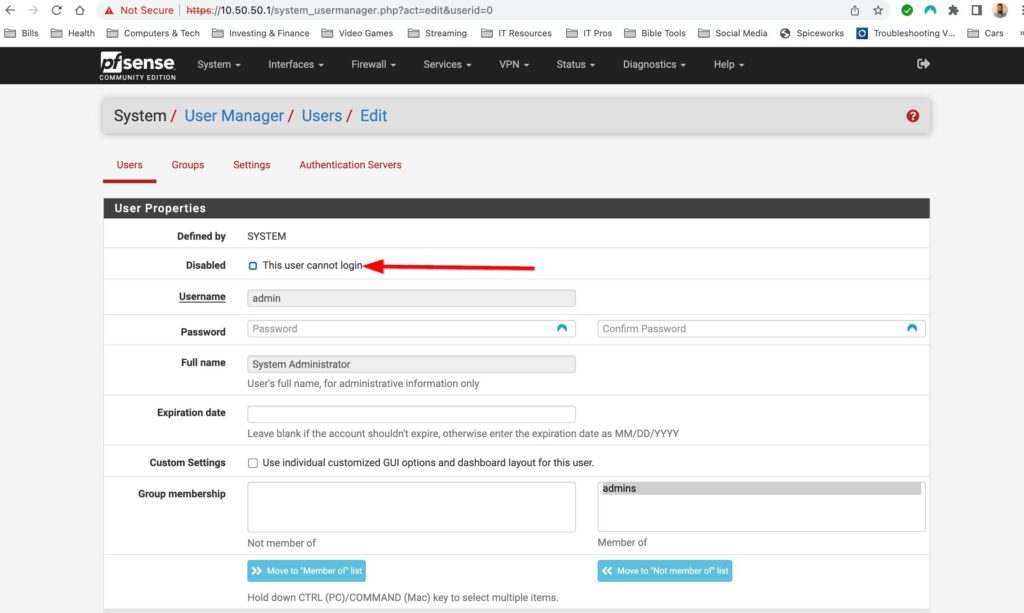
To create a new account go to System>User Manager. Then select add, fill out the username/password field and then add the user to the admins group. Finally sign out of the default admin account and sign into the new user account you just created to disable the default admin account. Go back to System>user manager and then select the pencil next to admin to edit the account.

Config Item:
-Configure DHCP Server
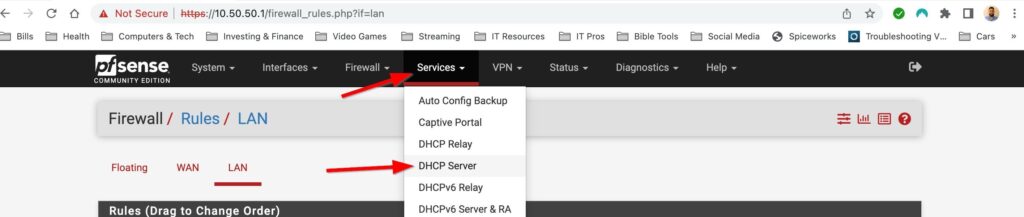
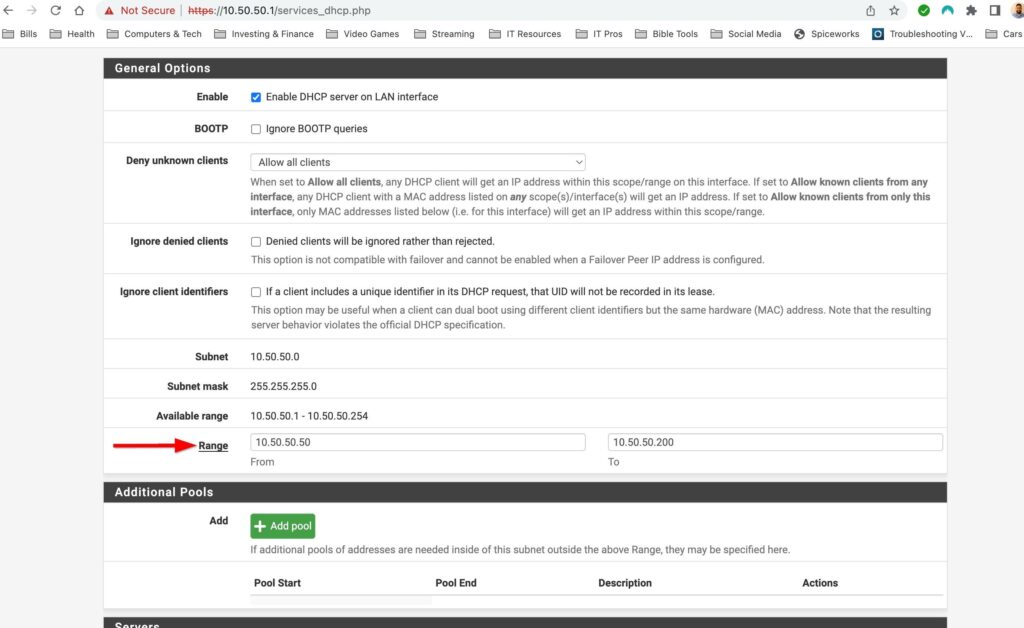
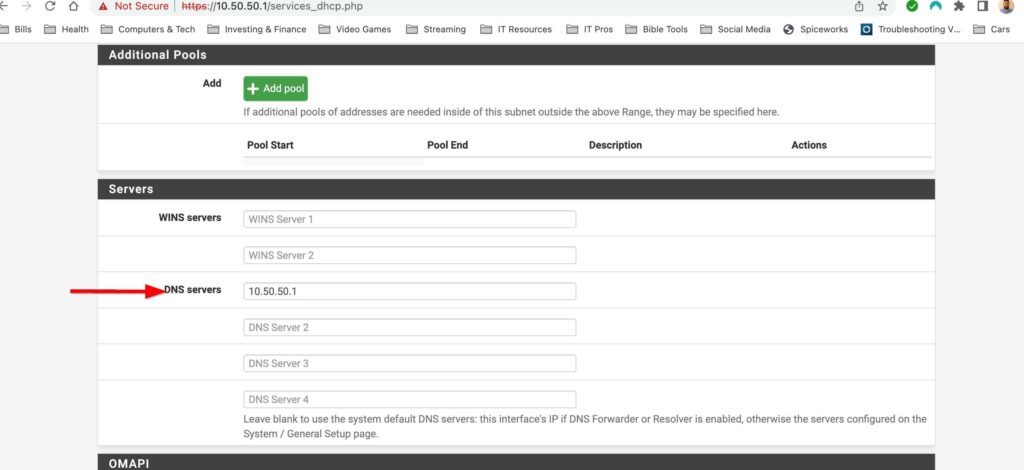
The DHCP server is already turned on so there isnt much to do here. I do however want to edit the DHCP scope as well as configure a DNS server to handout to clients on my network. You can make changes to the DHCP server by selecting Services>DHCP Server. I only have one LAN interface enabled at the moment so I can only make changes to this network. However if I had VLANs setup I would be able to make changes to DHCP for all those networks here. There are lots of tweaks you can add to DHCP in pfsense but right now all I want to do is change the DHCP scope and add a DNS server.
Config Item:
-Create deny all any-any rule for LAN
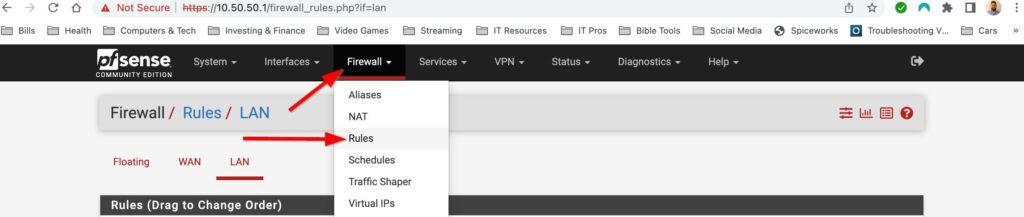
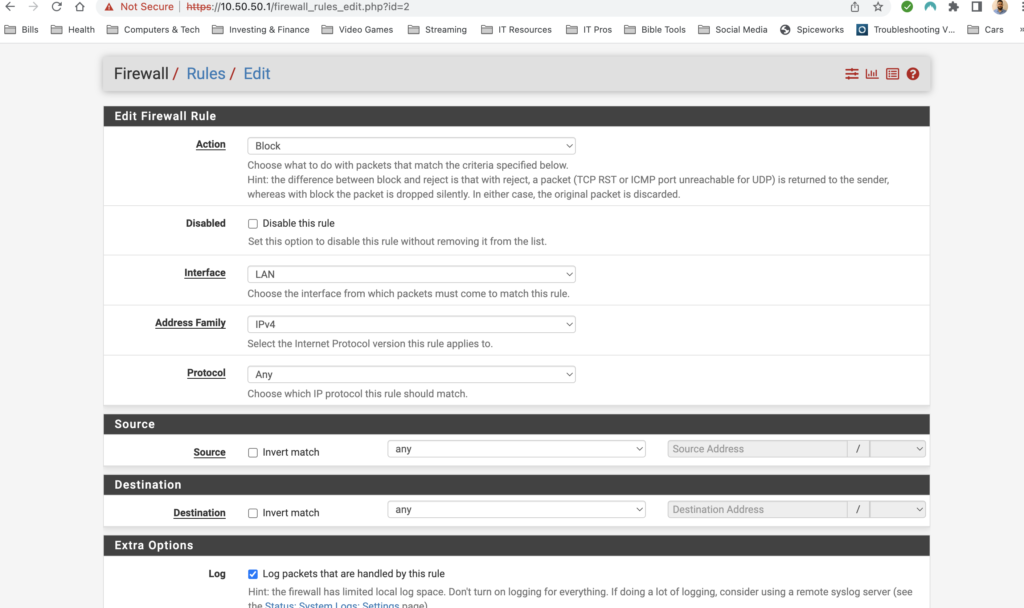
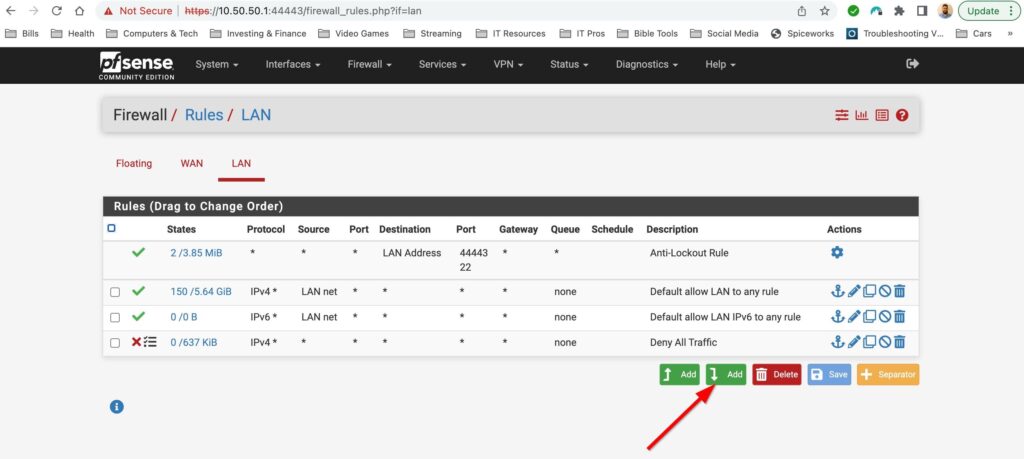
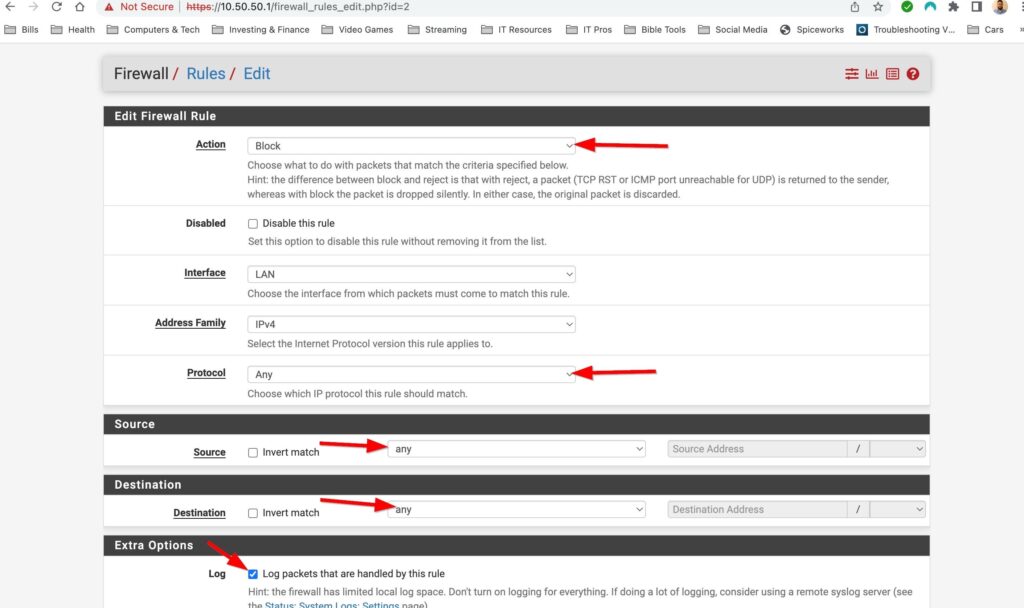
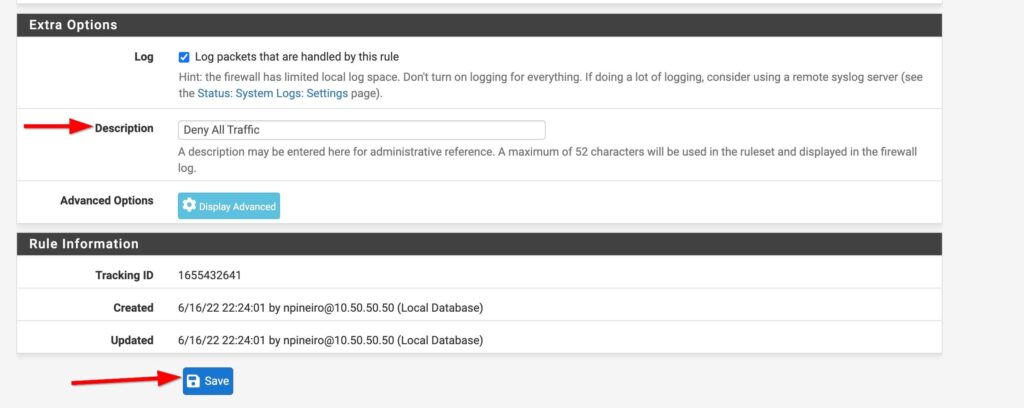
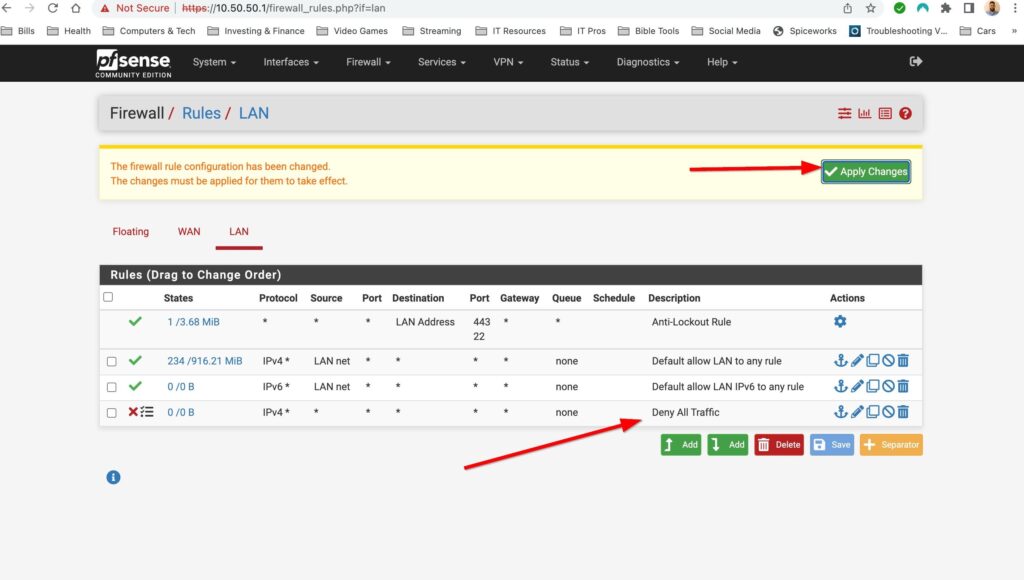
I plan on doing a whole post on firewall rules in the future but for now I will just add a deny any-any rule and log the traffic applied to this rule. Firewalls have an implicit deny rule but I like materialize it and generate logs to make troubleshooting easier. You can add firewall rules by selecting Firewall>Rules and then selecting the interface you want to add rules to. Select one of the green buttons to create the rule. The one with the arrow pointing up adds the rule to the top of the list and the green button with the arrow down puts the rule at the bottom. I also gave this rule a description to document what the rule is for. Lets put the rule at the bottom and create our rule:
And that’s it! My pfsense is up and running but the fun doesn’t stop there. This is a flat network and in the very near future I will be setting up VLANS, setting up a remote access server, playing with firewall rules and so much more. Pfsense makes managing my home network way more fun then using a boring old router from best buy. Stay tuned for more pfsense content!