How To Create An Answer File For Windows Unattended Install
If you have a Windows lab environment and find yourself installing Windows a lot, you can save time by creating an answer file to interact with all the questions prompted when installing Windows. You can use the answer file to install Windows unattended using command-line tools. You can also use an answer file to automate Windows installations with deployment tools like Windows Deployment Services (WDS), Microsoft Deployment Toolkit, (MDT), and more. In this blog post, I will detail the simple process of creating an answer file for Windows Server 2019. This process can be replicated for installing other versions of Windows as well (i.e. Windows 10, 11, Server 2016, etc)
Table of Contents
1. Downloading And Installing The Windows ADK
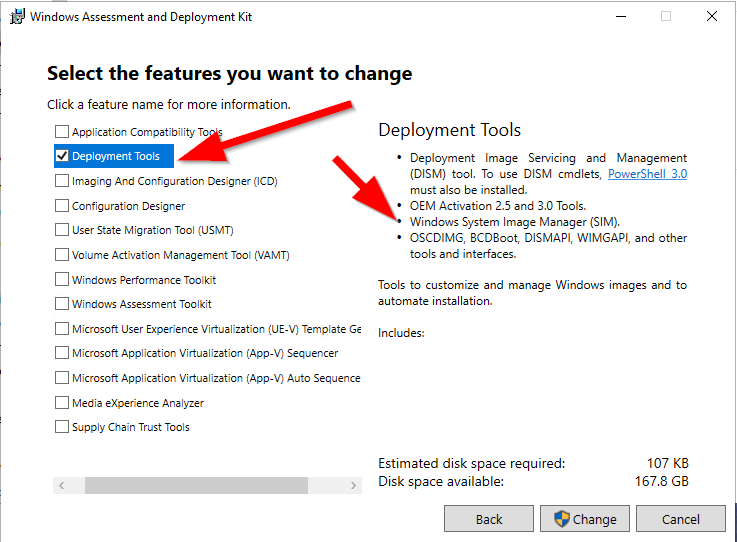
The Windows Assessment and Deployment Kit (Windows ADK) is a suite of tools used to create and deploy Windows images. One of those tools is called Windows System Image Manager. Download the latest Windows ADK and select the “Deployment Tools” feature:
2. Download And Mount The Windows ISO
You can download an evaluation copy of Windows Server here and an evaluation copy of the Windows client here. For this guide, I will be downloading Windows Server 2019. Next, you must mount the .iso and you can do this by right-clicking the iso to bring up the menu and selecting “Mount.” In File Explorer you should see the .iso in the left navigation bar:


3. Copy And Paste “install.wim” To The Local Drive
Navigate to the “sources” folder and copy and paste the “install.wim” to the hard drive. If you are using a Windows client .iso and you find an install.esd file, this file will not be recognized by Windows System Image Manager and you will need to extract the .wim file from it.
4. Create A New Answer File
If you have installed the Windows ADK you will see the deployment tools in the Start Menu. Navigate to it and launch Windows System Image Manager (SIM):

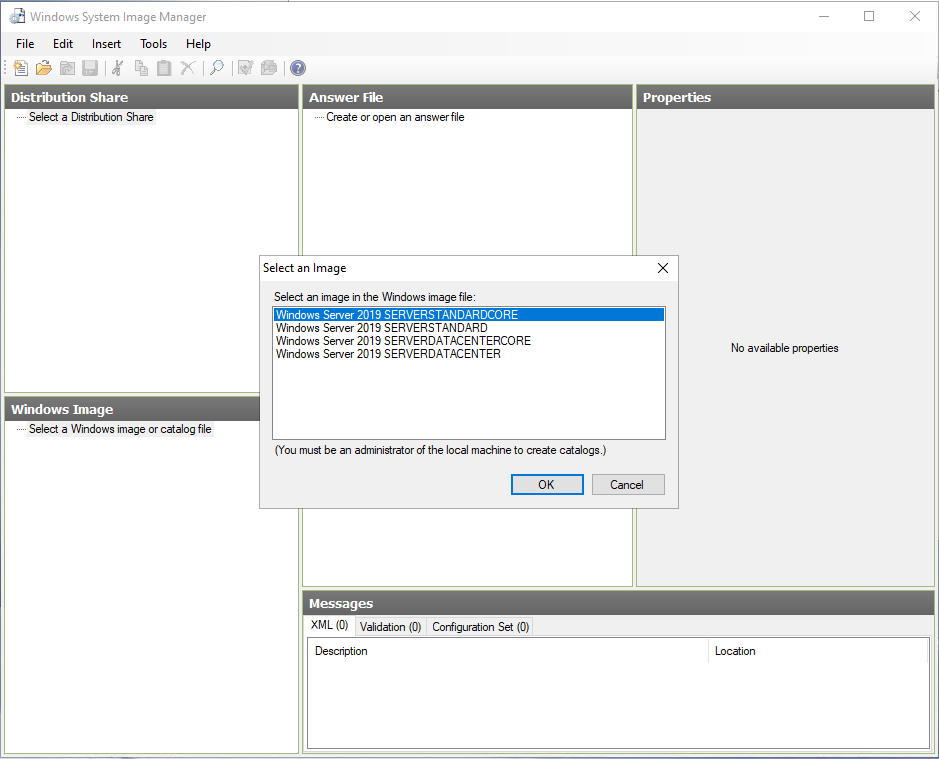
Once you launch SIM, right-mouse-click the area under “Windows Image” to bring up the menu and choose “Select Windows Image.” Then select the image in the new window that pops up. For this guide, I will be choosing Windows Server 2019 Datacenter edition:

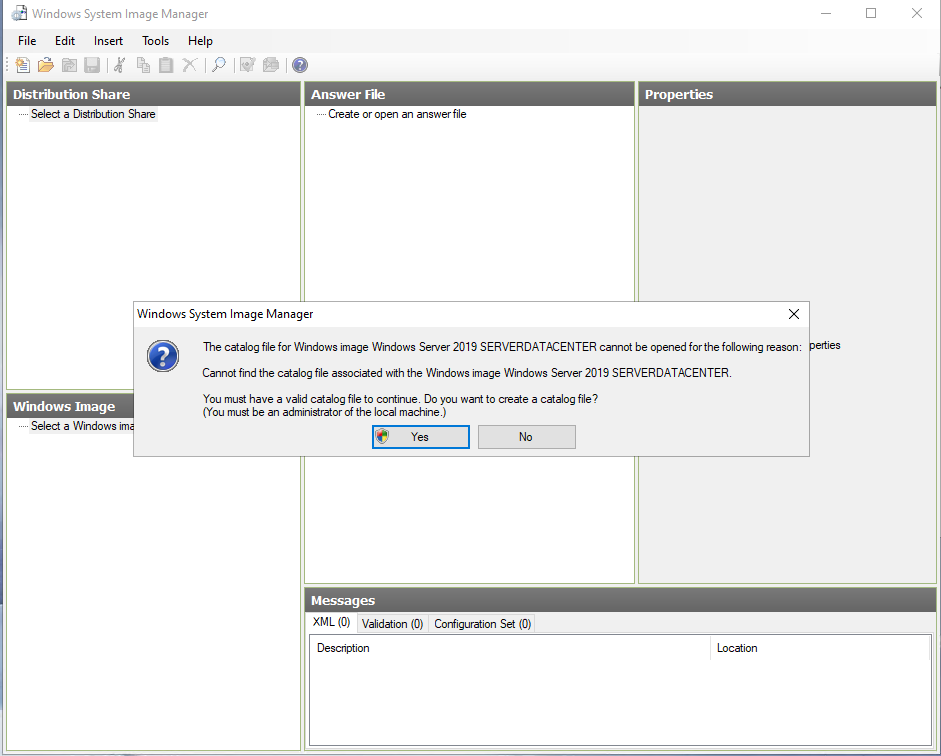
When you select the image and select OK, you will be prompted to create a catalog file if one is not already created. Select Yes:
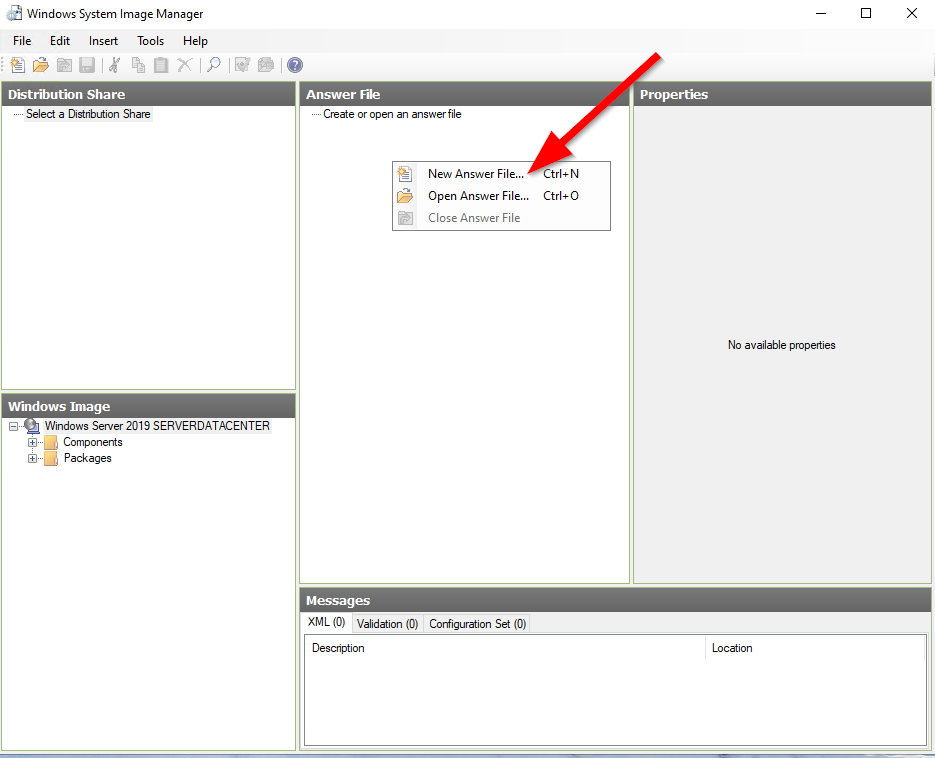
After the catalog file has been created, you can now create a new answer file by right-mouse-clicking the area under Answer File and selecting “New Answer File” or selecting File from the menu bar and selecting “New Answer File from there.
5. Customizing An Answer File
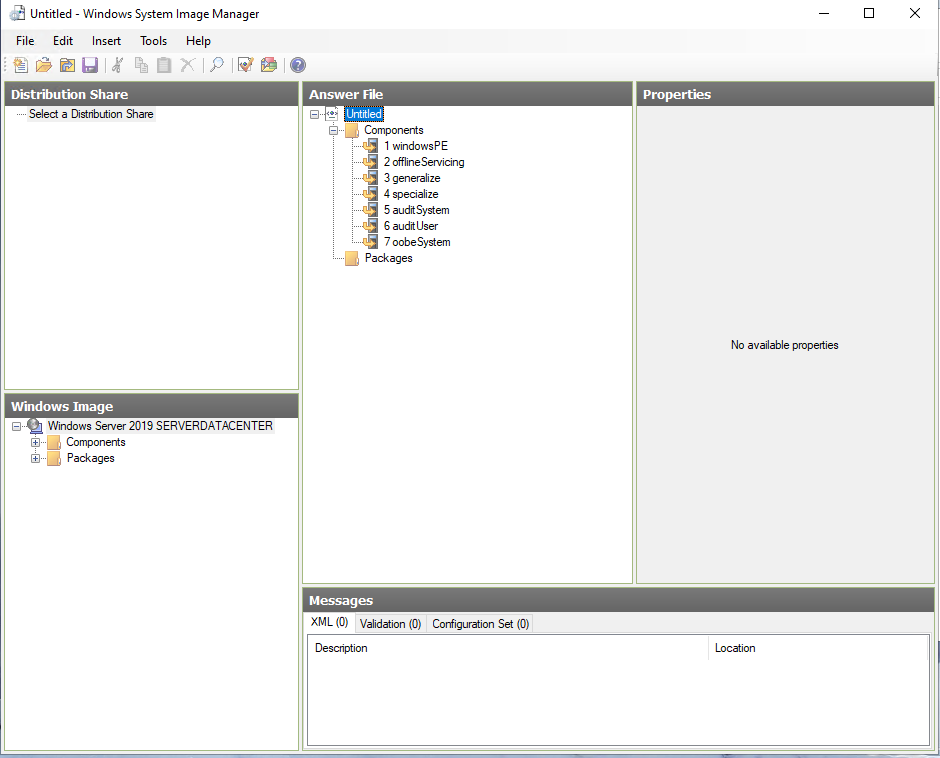
The answer file that will be created in this section will be for automating the installation of Windows Server 2019. The installation process is broken up into phases called “configuration passes”. When you create an answer file, all the phases are listed like “windowsPE”, and “offlineServicing” just to name a few. To customize the answer file, you must add each component of the Windows image and add them to the appropriate pass. Then after the component is added to the pass, you must customize its value(s). You can read more here about passes and how they work from Microsoft documentation. You can read more about all the components and the various settings you can configure for an unattended answer file here.
Pass 1 – WindowsPE
To add a configuration pass to an answer file, expand the components folder under “Windows Image” and right-mouse click a component to bring up the menu to add it to the appropriate pass. The pass is preceded by the architecture and for this answer file, I will be choosing amd64 components.
Language and Locality settings (Windows Setup)
To add language and locality settings to the Windows setup, find amd64_Microsoft-Windows-International-Cire-WinPE, and add to Pass 1. Then select “SetupUILanguage: and enter the country code value for UILanguage:


Initial Disk Configuration Settings
To add disk configuration settings find the component amd64_Microsoft-Windows-Setup and add to Pass 1. Later in this guide, I will include a shortcut to adding in this configuration by editing the final .xml file but for now, we will set a value for disk configuration to show in Windows Setup. Under the answer file, expand Pass 1 WindowsPE>amd64_Microsoft-Windows-Setup>Disk Configuration. Set the value for “WIllShowUI” to Always.


Specifying a Product Key
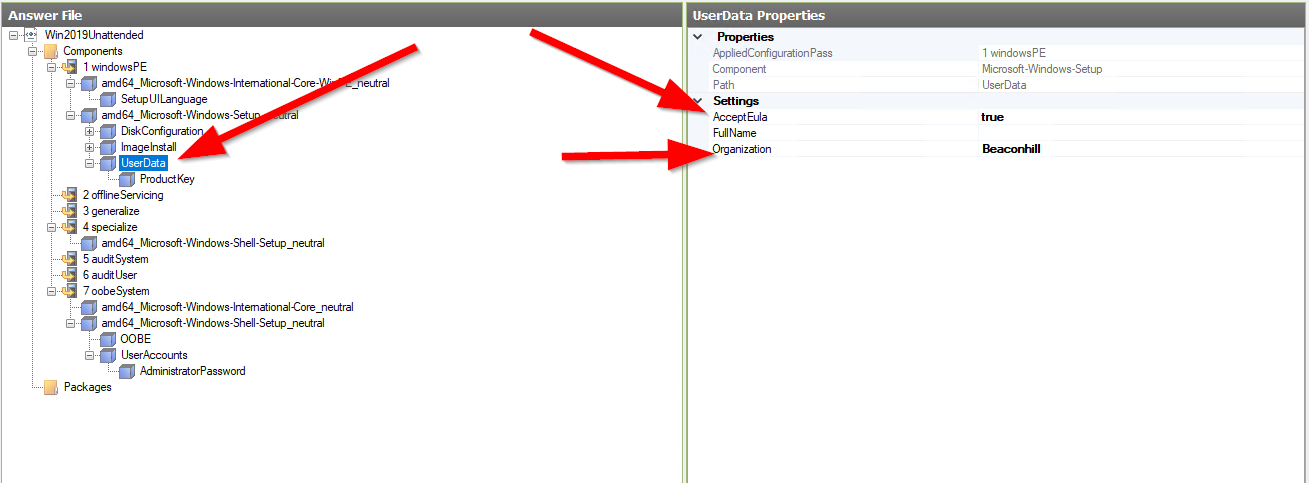
For this answer file, I will be using the Generic Volume Licence Key (GVLK) for Windows Server 2019. In the answer file under Pass 1, expand amd64_Microsoft-Windows-Setup>User Data>Product Key. Enter the product key for the value for “Key:” In addition, select “UserData” in the answer file and set “AcceptEula” to true, and then enter a value for “Organization:”

Pass 4 – Specialize
Time Zone Settings
To configure the time zone, locate the component amd64_Microsoft-Windows-Shell-Setup under “Windows Image, right mouse click, and add to Pass 4. Then under the answer file find the Windows Shell setup component and expand it. Then select it and enter a value for “TimeZone.” If you do not know your time zone, you can open a command prompt and use tzutil /g to retrieve your time zone.


Pass 7 – oobeSystem
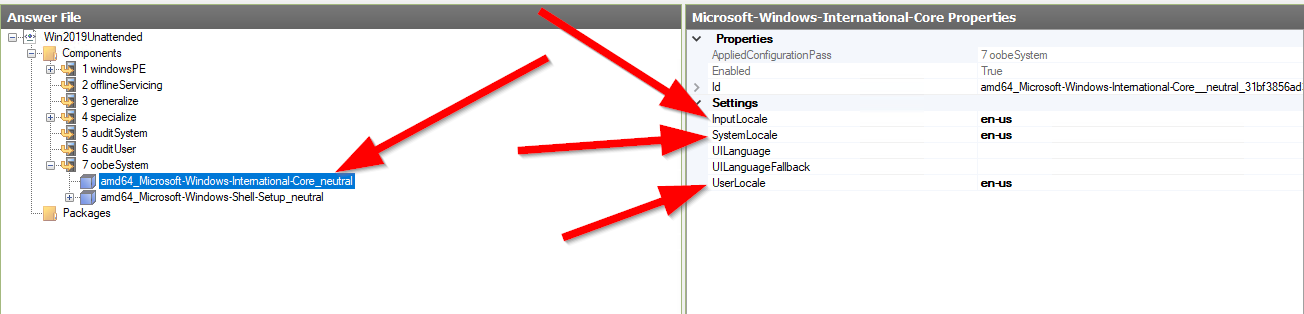
Language and Locality for Operating System
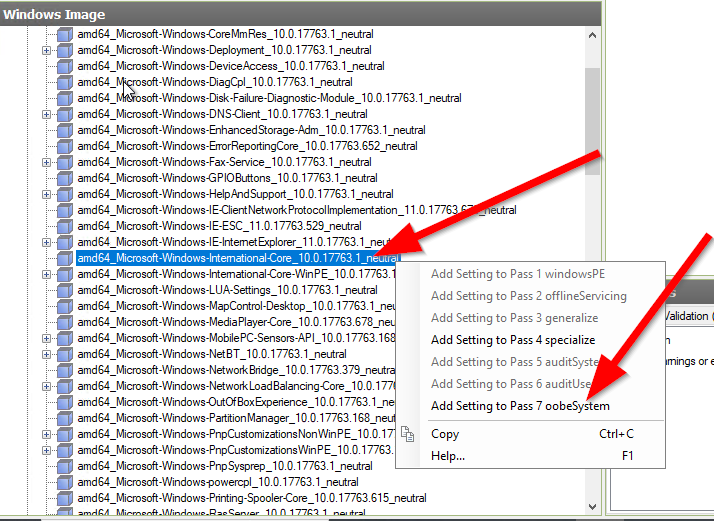
To configure the language and Locality for the operating system, find the component amd64_Microsoft-Windows-International-Core under “Windows Image,” right-mouse click, and then add to Pass 7. In the Answer File section, expand Pass 7>amd64_Microsoft-Windows-International-Core. Input the country code for the following values: “InputLocal,” “SystemLocale,” and “UserLocale”
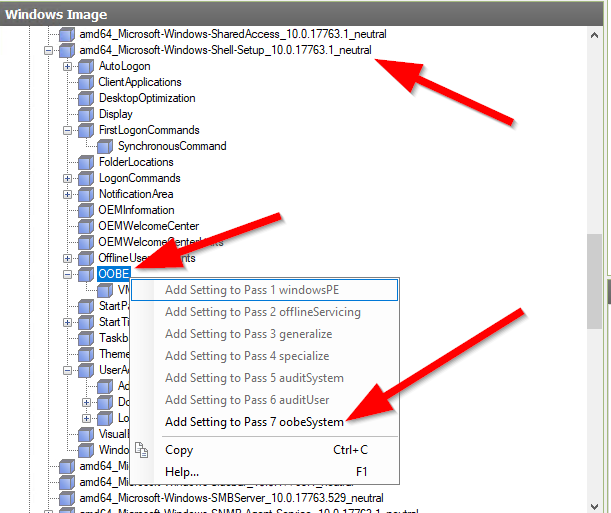
OOBE Settings
To configure OOBE settings, find the component amd64_Microsoft-Windows-Shell-Setup and add it to Pass 7. In the Answer File section, expand Pass 7>amd64_Microsoft-Windows-Shell-Setup>OOBE and select OOBE. Set the following values to true: “HideEULAPage,” “HideOEMRegistrationScreen,” “HideOnlineAccountScreens,” and “HideWirelessSetupInOOBE.” In addition, set the value for “ProtectYourPC” to 1.

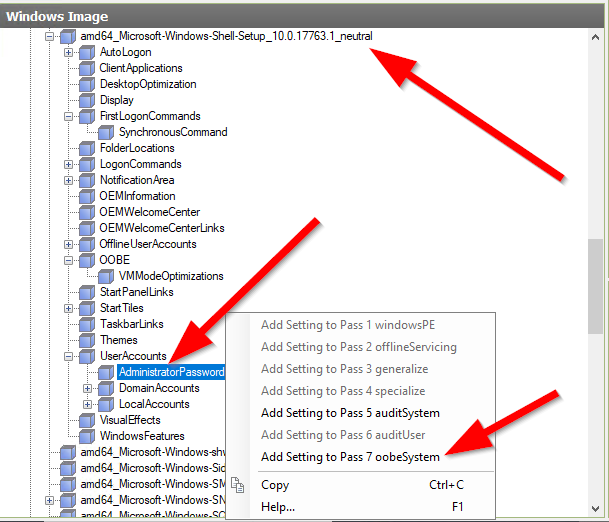
Administrator Password
To configure the password for the built-in administrator account, find the component amd64_Microsoft-Windows-Shell-Setup>UserAccounts>AdministratorPassword and add it to Pass 7. In the Answer File section, expand Pass 7>amd64_Microsoft-Windows-Shell-Setup>UserAccounts>AdministratorPassword. Set a password for the key “Value.”

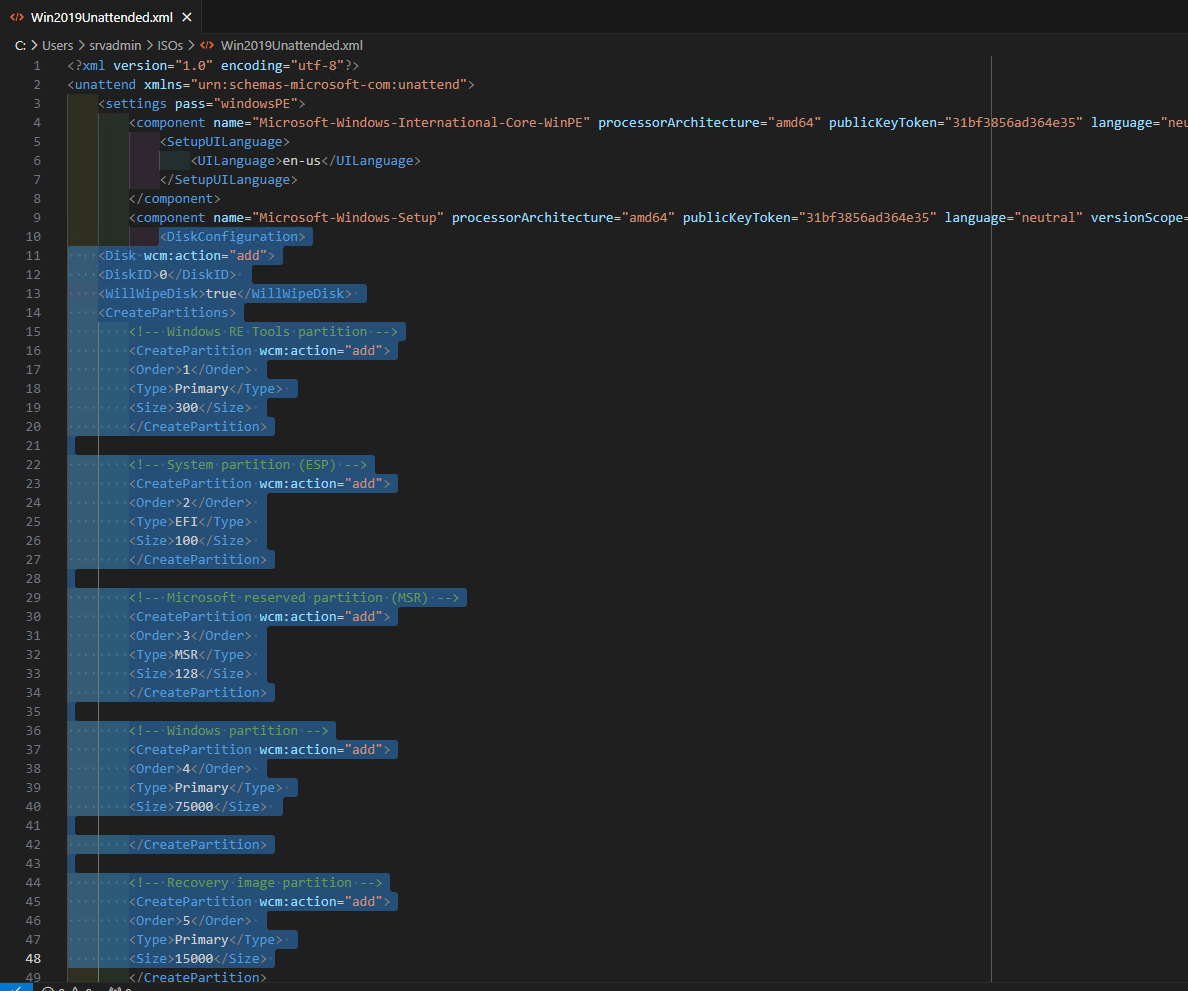
Final Steps & Disk Configuration
You can finally save the answer file. In SIM, select File>Save Answer File. Your answer file will be saved as a .xml file. Open this .xml file in your favorite text editor. I will be using vscode. Microsoft has sample code that you can copy and paste into your xml file which makes configuring partitions very simple. The hyperlink in the previous sentence will take you to the document. For this answer file, I will copy and paste the configuration for a UEFI-based partition layout with a recovery partition. I have highlighted the section below that should be deleted. Just copy and paste the code there and save. Modify the partition values for your use case!

6. Validate Answer File
Open the Answer File in SIM and press the “Validate ANswer File” button in the menu bar. If you followed this guide you should receive two validation errors:


Navigate to the Windows Setup component in Pass 1 and locate the modify partitions component. Delete “Order,” and “PartitionID.” There should no longer be any more validation errors!

You now have a functional and flexible answer file to automate the installation of Windows Server 2019. If you have Windows Server 2019 bootable media on a thumb drive just copy and paste the answer file to the root of the thumb drive. Make sure that the name of the file is “autounattended.xml.” You can also use the answer file with Microsoft Deployment Tools like WDS and MDT. Happy Automating!